
Setting Up OAuth in SailPoint IdentityIQ Using Postman
Date Posted:
Category:
Security
Author:
Dhanasekar
Setting Up OAuth in SailPoint IdentityIQ Using Postman
Date Posted:
Category:
Security
Author:
Dhanasekar
Setting Up OAuth in SailPoint IdentityIQ Using Postman
Date Posted:
Category:
Security
Author:
Dhanasekar
Get your Tailored Quote for your Organisation
Get your Tailored Quote for your Organisation
Get your Tailored Quote for your Organisation
Setting up and Testing OAuth in SailPoint IdentityIQ Using Postman
Introduction
This blog describes how to configure OAuth in IdentityIQ and test it using Postman.
Step 1: Create OAuth Client in IdentityIQ
OAuth client has to be created in IdentityIQ.
Steps:
In the IdentityIQ application, navigate to Global Settings > API Authentication > OAuth Client Management.
Click on Create and enter Client Name, Proxy User and save.
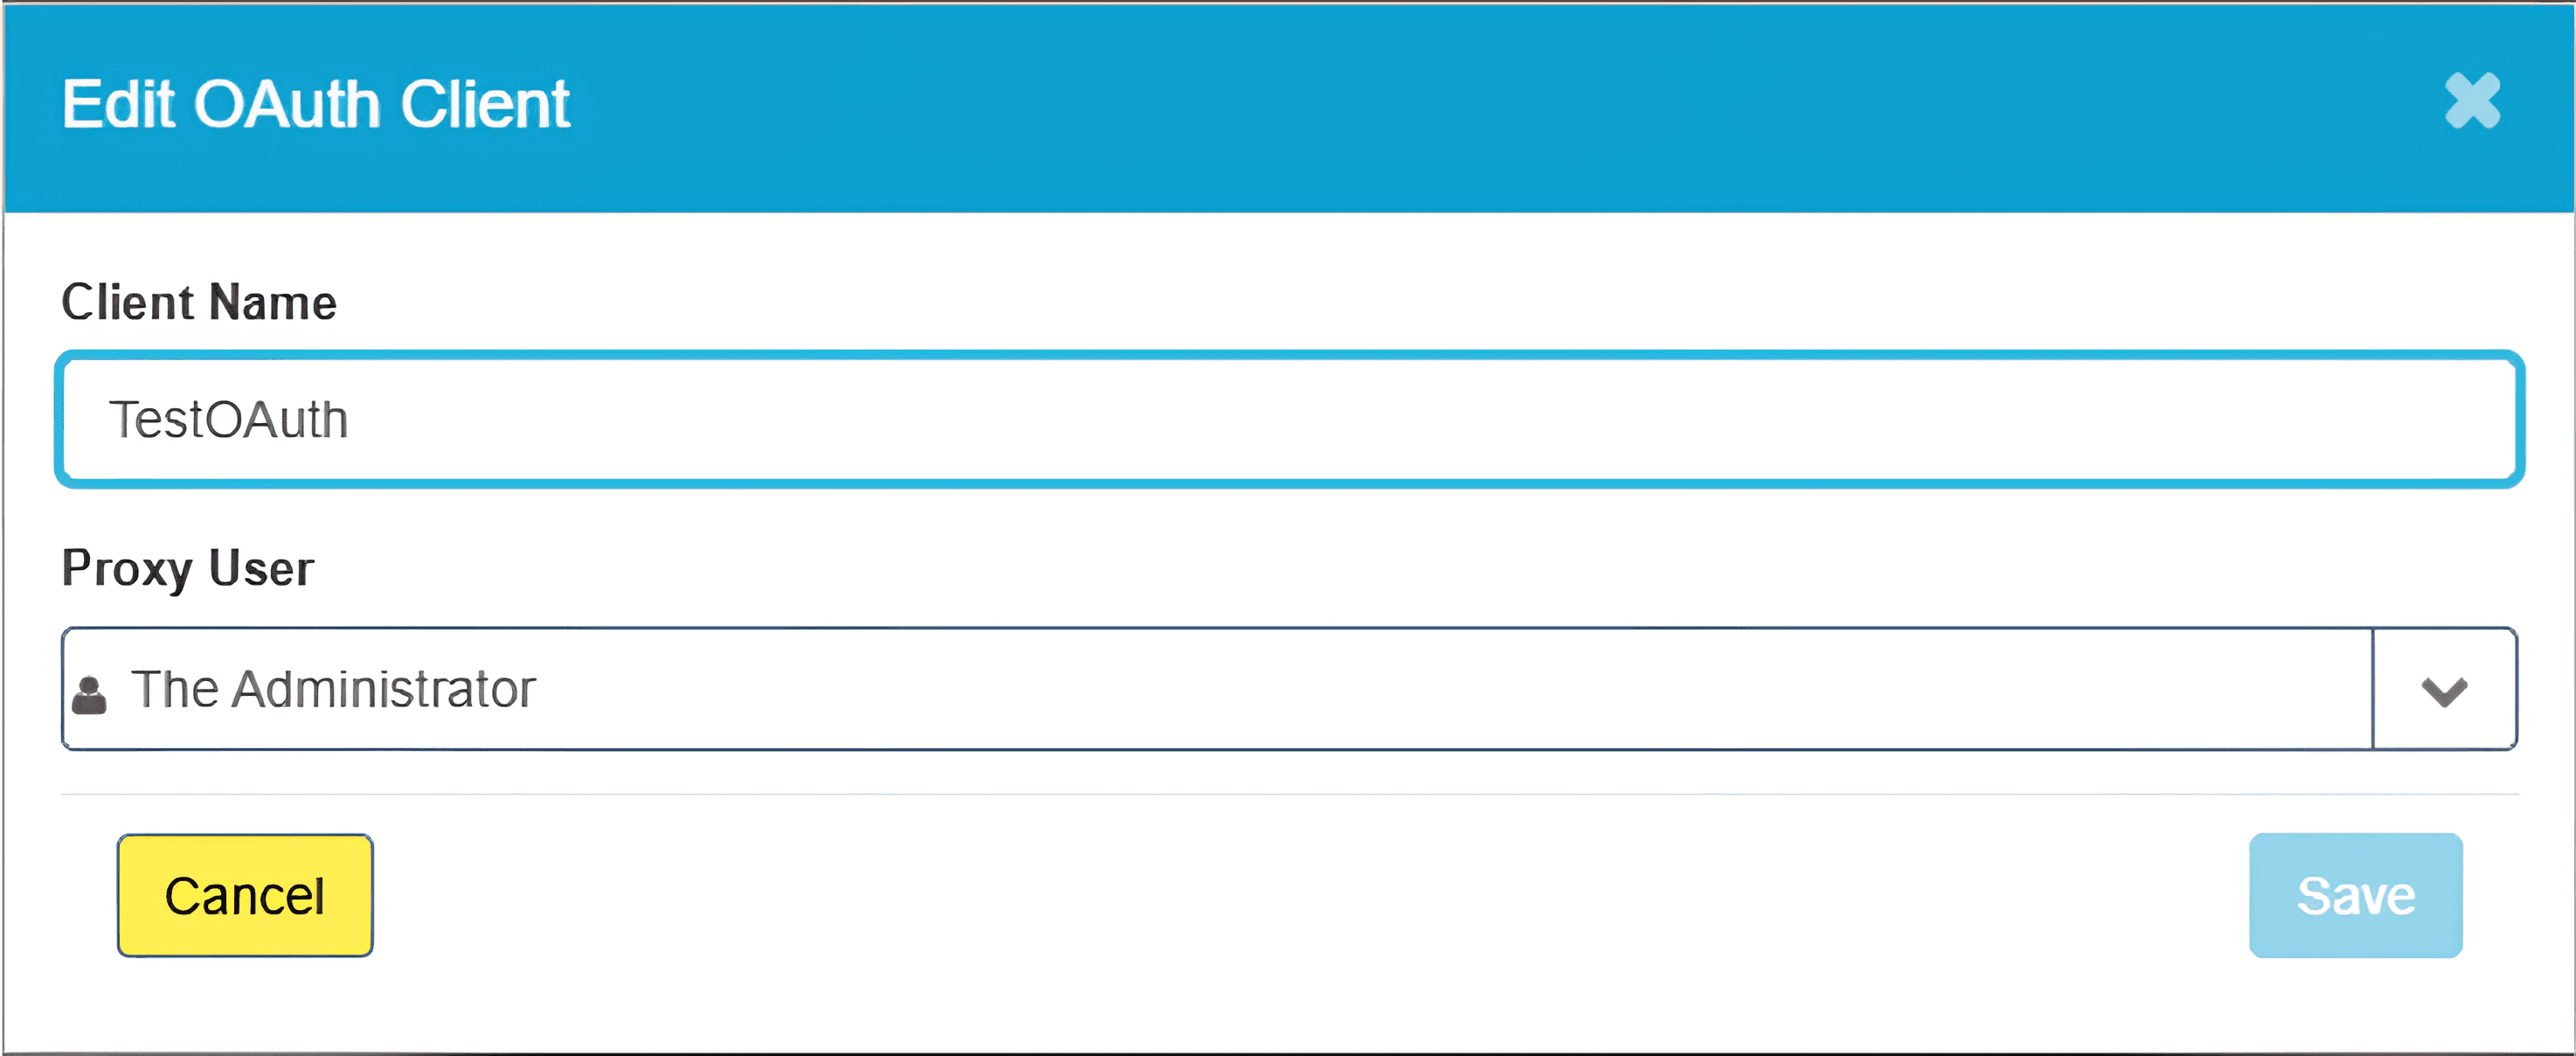
Save the below information:
Client ID
Client Secret

Step 2: Generate Access Token using Postman
Next, the OAuth access token is generated using Postman.
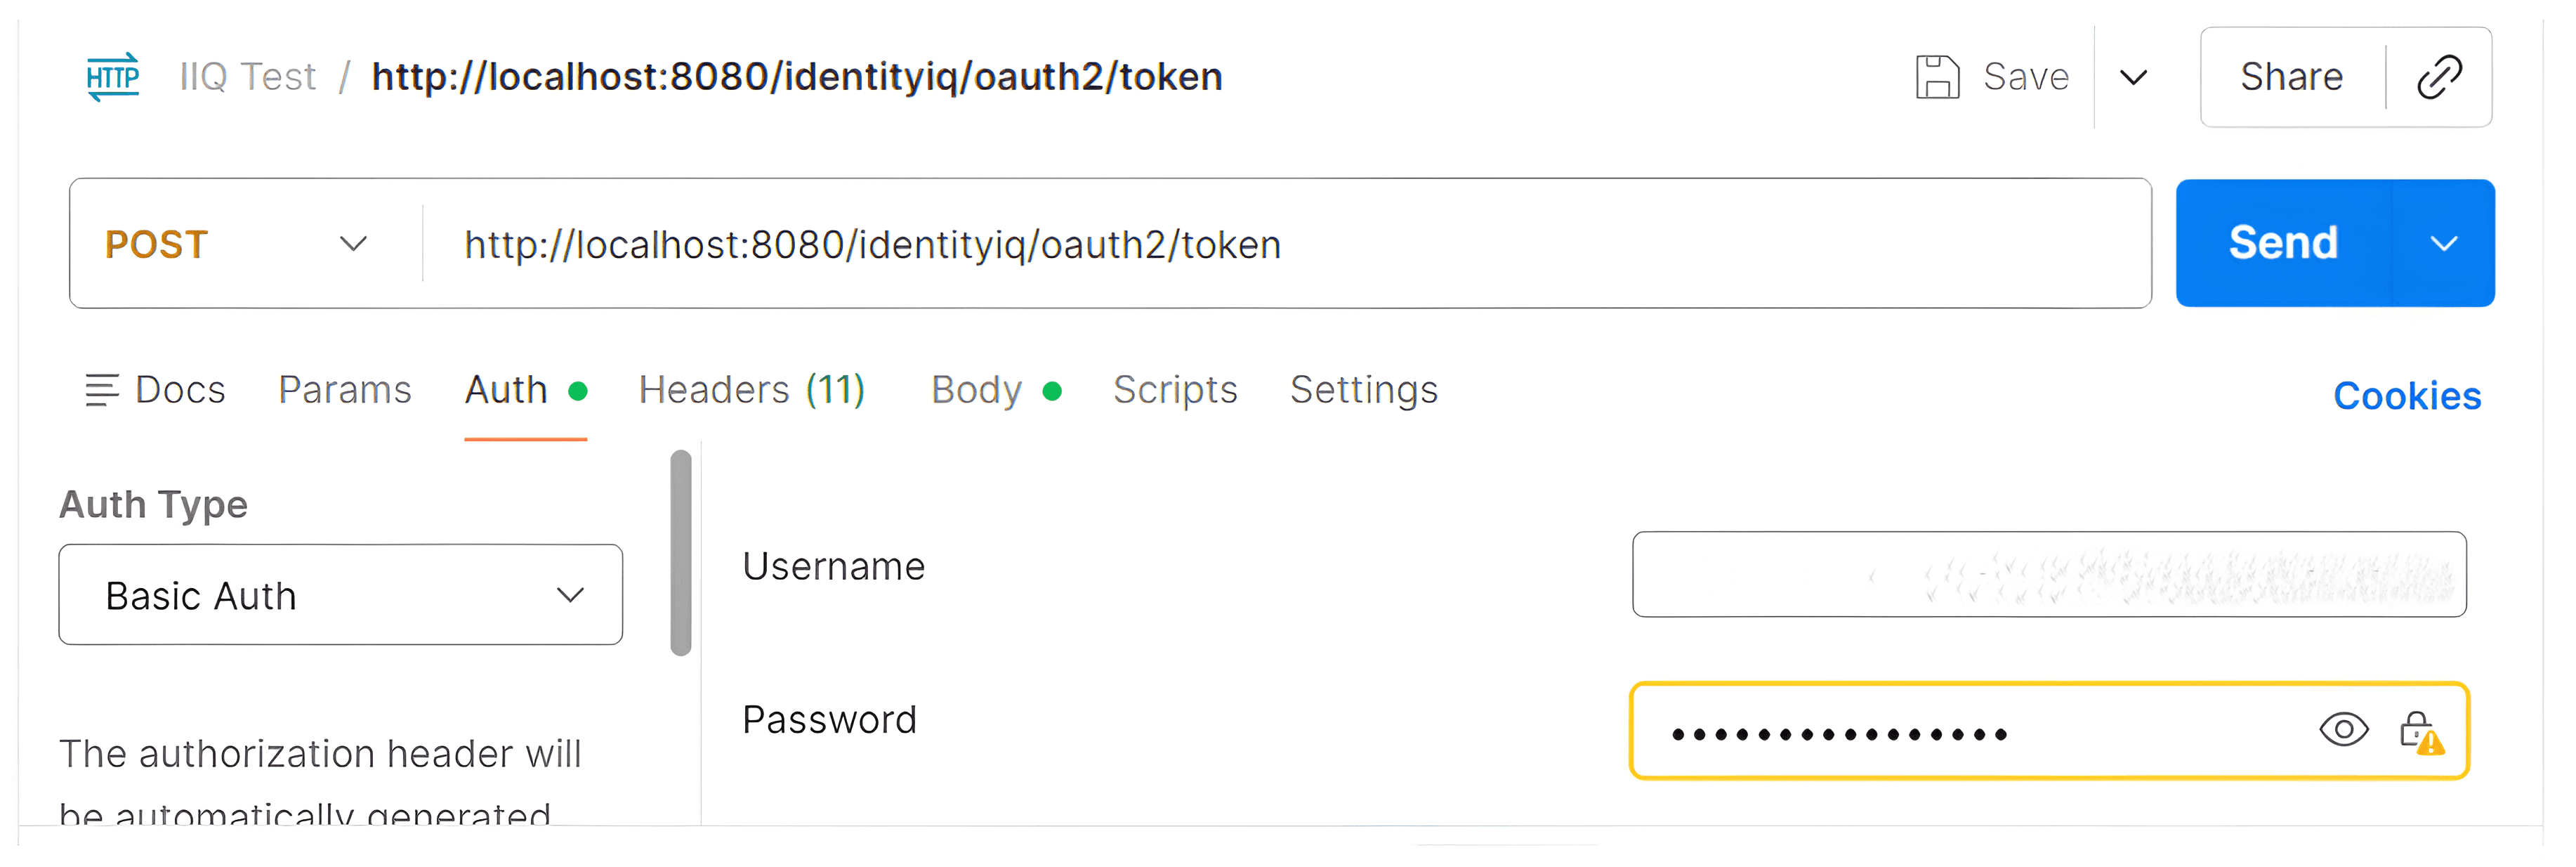
1. Open Postman and enter:
Method: POST
URL: http://localhost:8080/identityiq/oauth2/token
2. Go to "Authorization" tab:
Auth type: Basic
Username: Client ID
Password: Client Secret
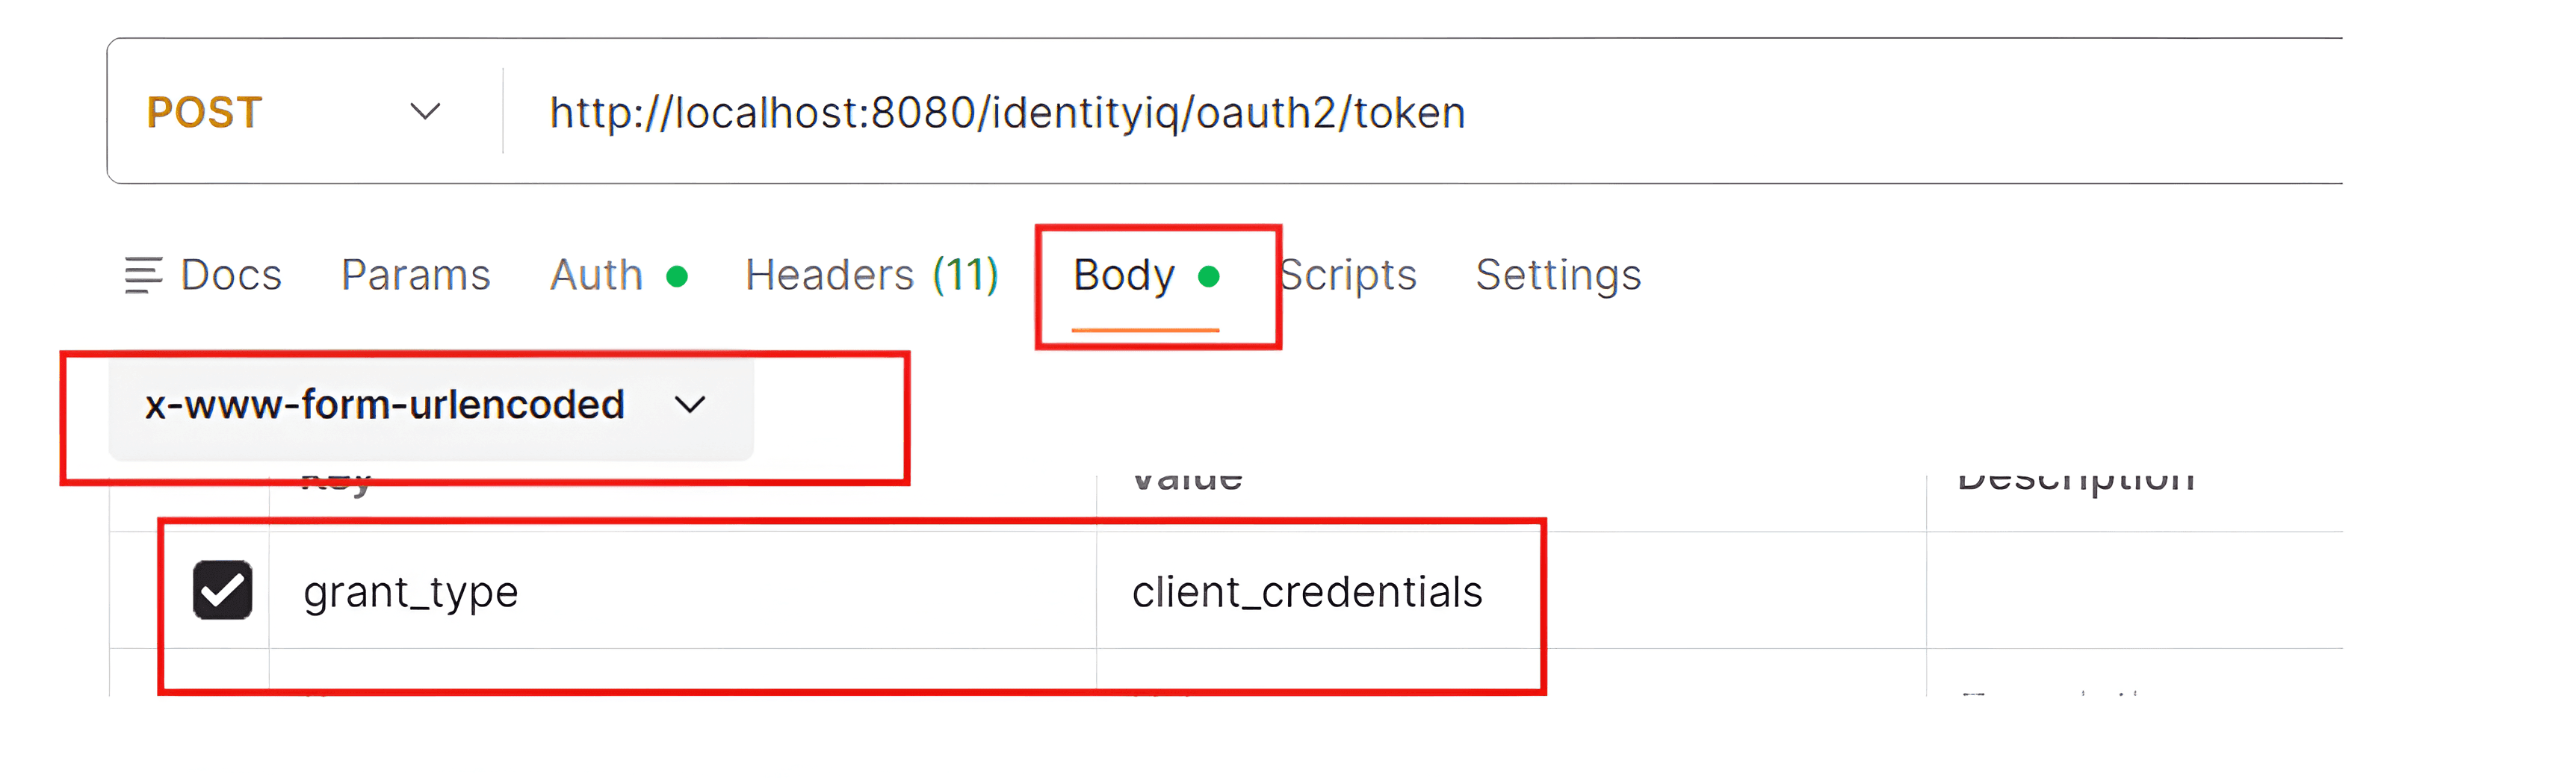
3. Go to "Body" tab:
Key: grant_type
Value: client_credentials
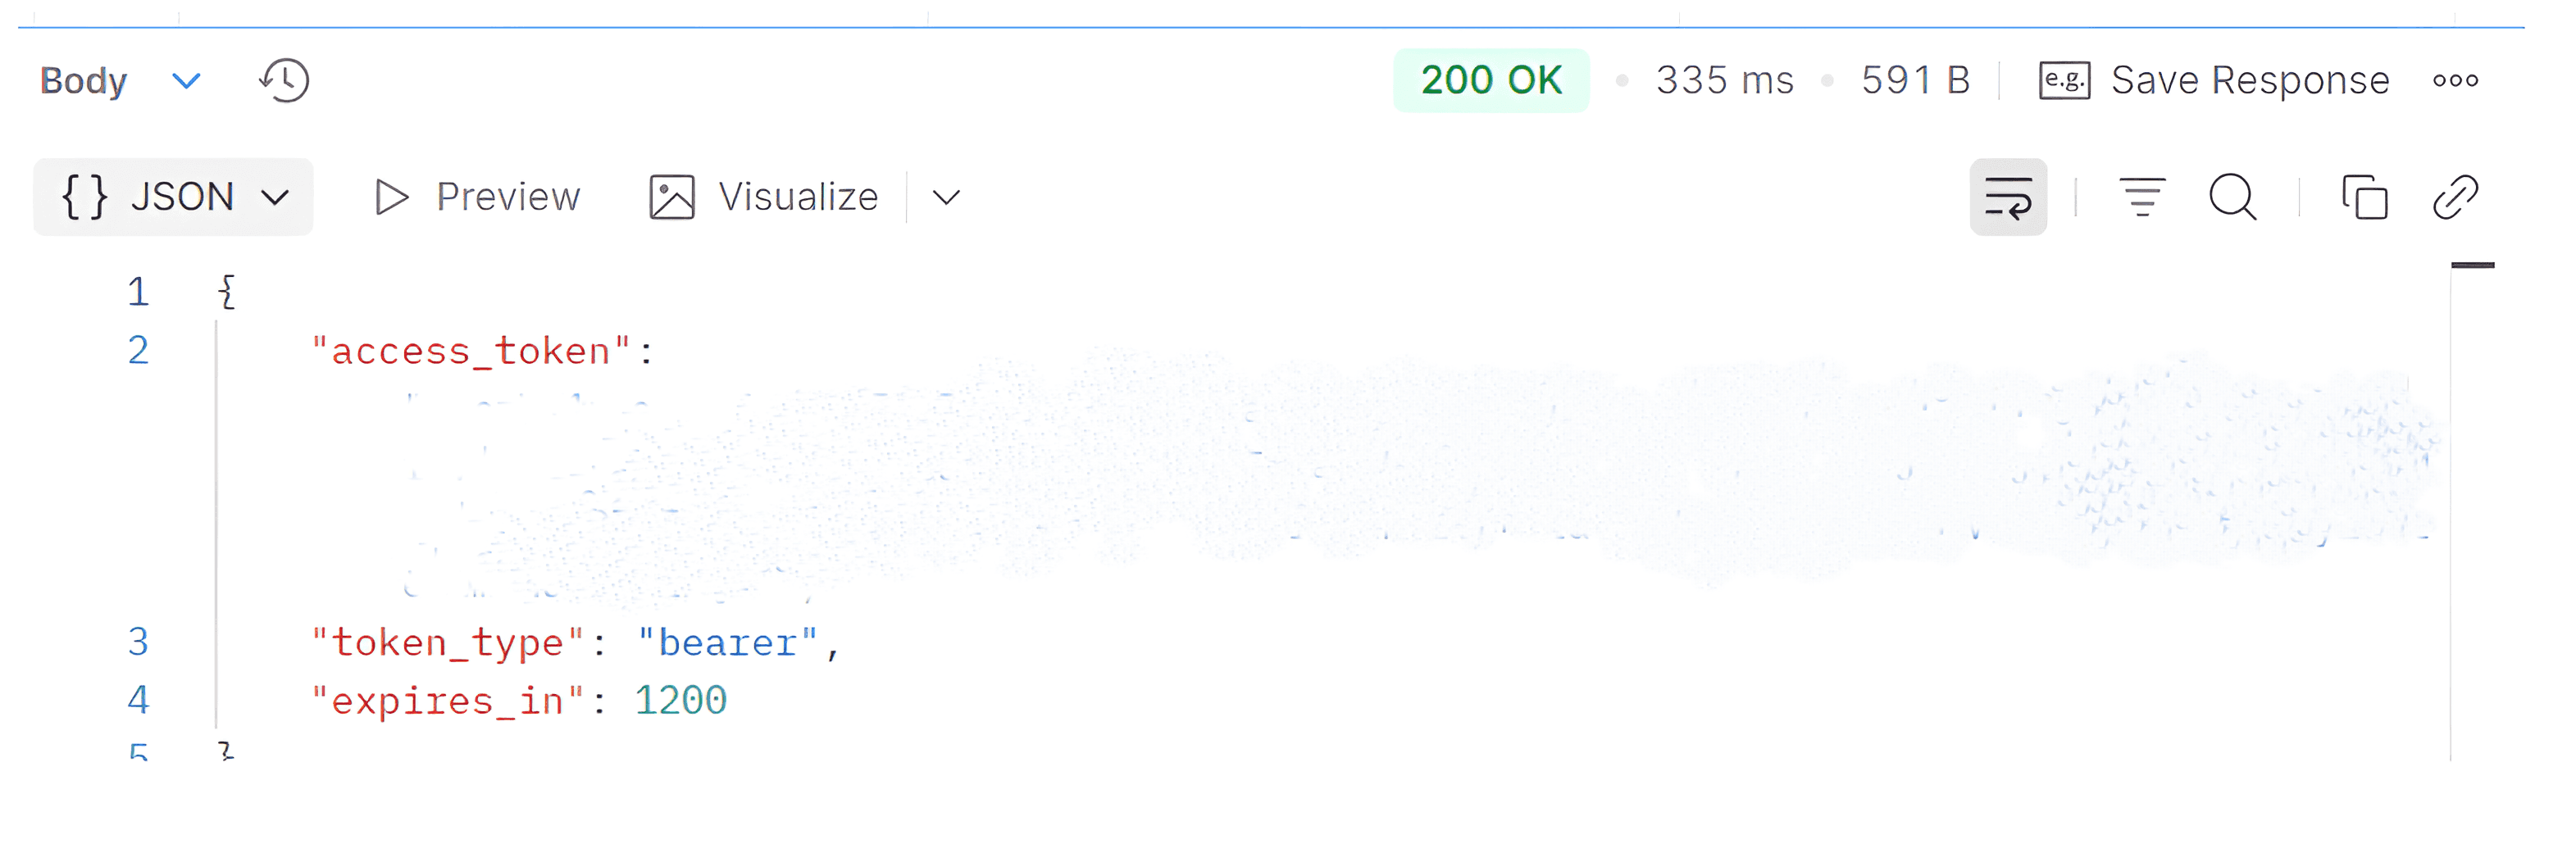
4. Click on "Send".
Copy the "access_token".
Step 3: Test IdentityIQ API using Access Token
Now test the API using the access token.
Method: GET
URL: http://localhost:8080/identityiq/scim/v2/Users
Go to the Authorization tab:
Auth type: Bearer Token
Paste: access_token
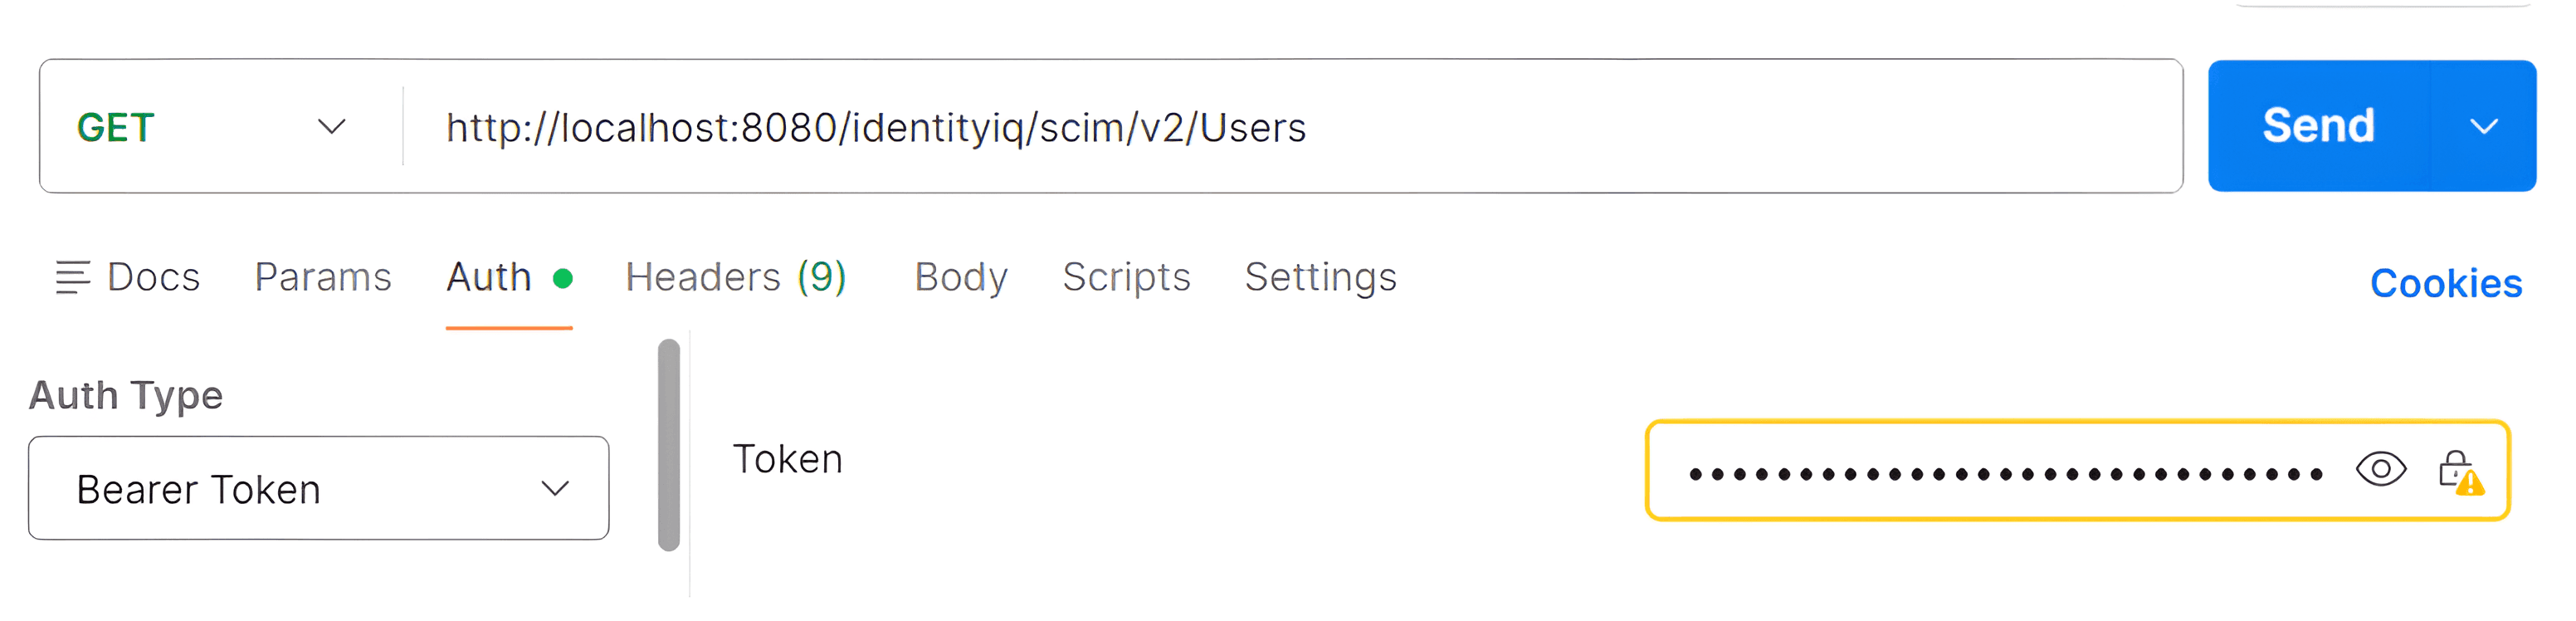
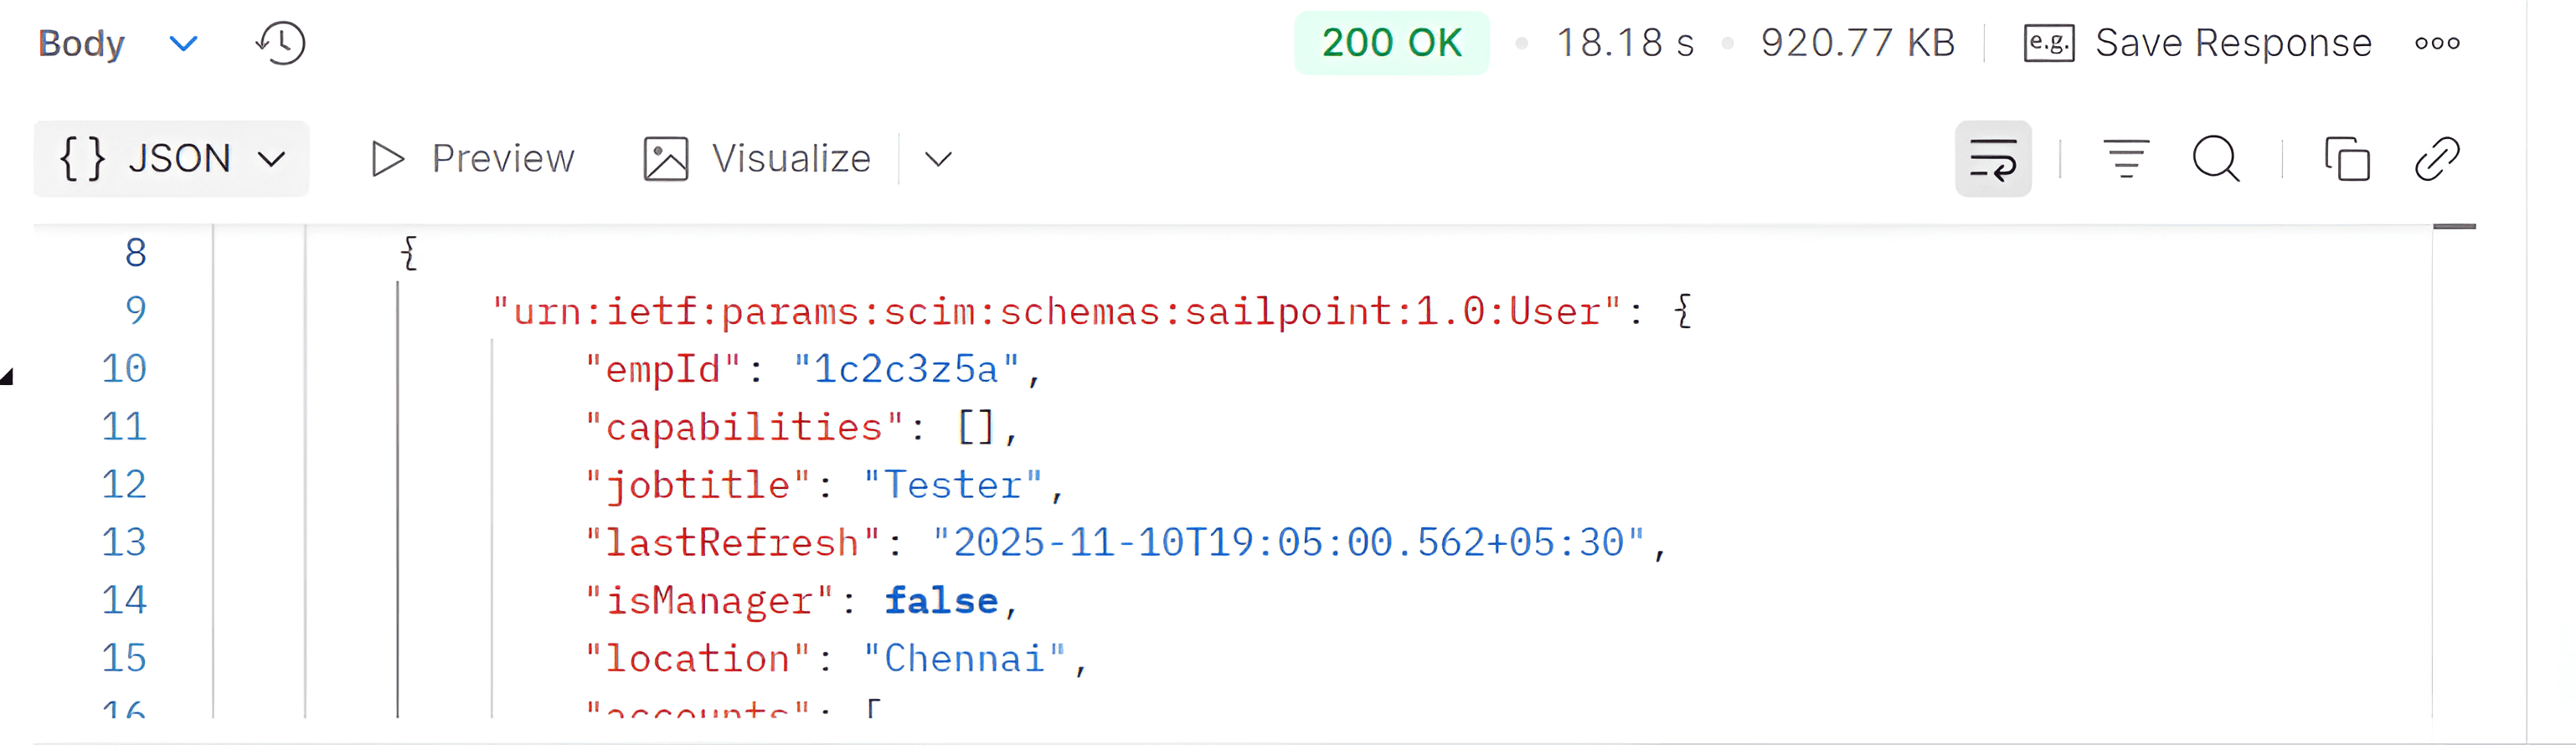
Click Send. You will see a list of IdentityIQ users.
Conclusion:
In the context of the SailPoint IdentityIQ application, the OAuth authentication process is beneficial in the sense that the API access is possible without the use of end-user credentials. It is possible to access the IdentityIQ API securely using the OAuth client and access token generated using Postman.
Stay tuned to our blog to see more posts about
Sailpoint products implementation and its related updates.
Stay tuned to our blog to see more posts about SailPoint products implementation and its related updates.
Category:
Category:
Security
Security
Setting up and Testing OAuth in SailPoint IdentityIQ Using Postman
Introduction
This blog describes how to configure OAuth in IdentityIQ and test it using Postman.
Step 1: Create OAuth Client in IdentityIQ
OAuth client has to be created in IdentityIQ.
Steps:
In the IdentityIQ application, navigate to Global Settings > API Authentication > OAuth Client Management.
Click on Create and enter Client Name, Proxy User and save.
Save the below information:
Client ID
Client Secret
Step 2: Generate Access Token using Postman
Next, the OAuth access token is generated using Postman.
1. Open Postman and enter:
Method: POST
URL: http://localhost:8080/identityiq/oauth2/token
2. Go to "Authorization" tab:
Auth type: Basic
Username: Client ID
Password: Client Secret
3. Go to "Body" tab:
Key: grant_type
Value: client_credentials
4. Click on "Send".
Copy the "access_token".
Step 3: Test IdentityIQ API using Access Token
Now test the API using the access token.
Method: GET
URL: http://localhost:8080/identityiq/scim/v2/Users
Go to the Authorization tab:
Auth type: Bearer Token
Paste: access_token
Click Send. You will see a list of IdentityIQ users.
Conclusion:
In the context of the SailPoint IdentityIQ application, the OAuth authentication process is beneficial in the sense that the API access is possible without the use of end-user credentials. It is possible to access the IdentityIQ API securely using the OAuth client and access token generated using Postman.
Stay tuned to our blog to see more posts about
Sailpoint products implementation and its related updates.
Category:
Security


